


What are the health benefits of various kinds of plant milk? Which to choose and why?
Those who read my blog or who know me well, know that I avoid dairy products, virtually in any shape or form.
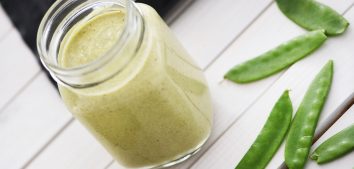
Photos: Marta Wojtal
My lactose intolerance was what made me come to this decision, but the health benefits and the significant improvement in the way I feel every day have made up for the absence of dairies from my menu.
Many years ago I couldn’t imagine a day without having a cottage cheese or yogurt. At some point, however, I noticed that I suffer from muscle fatigue more and more often during my training sessions; especially the ones in my legs were a nuisance. Furthermore, I had problems with my complexion and dozing off during the day became a regular thing. And then one day it turned out that I don’t tolerate lactose, so I decided to give up dairy products entirely. The results were already visible after a couple of days. My skin has improved considerably and I was no longer constantly tired, both physically and mentally.
It turns out that about 80% of us don’t digest cow’s milk well. We are often not even aware that we do not have the enzyme needed to break down lactose in our body. And intolerance symptoms can be really very different in each case and are not always noticeable immediately after having a sip or two of milk.
Any alternatives?
For my food and drinks I use plant-based milk.
Do I miss the traditional cow’s dairy products, milk in particular? Absolutely not :).
Plant milk
When it comes to plant milk we have a large range of possibilities in terms of type and flavor. It can be made of nuts, legumes, grains, or cereals. Not only are they of different flavor, but they also vary with respect to nutritional value or use. The word “milk” in the case of “plant milk” is only conventional, as usually products of this type are referred to as simply plant-based drinks.
Benefits of using plant milk:
- depending on the type, they are source of many valuable elements and vitamins
- they do not contain lactose
- they contain no cholesterol
- they are perfect for people with slow metabolism
- they facilitate digestion
- they are perfect for vegans and vegetarians
What goes well with plant milk and what to use it with?
- dishes, served both hot and cold
- desserts (ice cream, cakes, various cookies and pastries)
- beverages (cappuccino with coconut or soy milk is one of my favorite peccadillos :))
- smoothies
- cocktails
- pancakes
- porridges
- soups
- vegetables
- meats
What plants can you use to make plant milk?
- soy
- coconut (coconut flakes)
- hemp seeds
- walnuts
- hazelnuts
- almonds
- cashew nuts
- macadamia nuts
- pine nuts
- millet groats
- buckwheat
- rice
- oats
- sesame seeds
- sunflower seeds
- pumpkin seeds
Types of plant-based drinks and how to prepare your own homemade plant milk
Things you need for preparing your own homemade plant milk:
- A high glass container, fine-mesh strainer, and wooden spoon.
- A high glass container, linen cloth or dressing gauze from a pharmacy, wooden spoon, and rubber band.
If I want the drink to be fatty, I use the following proportions:
- 1⁄2 container filled with grains/seeds + 1⁄2 container filled with water = thick and fatty milk for creams, yogurts, etc.
For a less thick consistency, check out the proportions below:
- 1/3 container filled with grains/seeds + 2/3 container filled with water = milk for coffee, porridge, etc.
This option is good for cashew or macadamia nuts, for example, as they are very fatty. Oat milk contains less fat.
You can use what’s left to enrich your other meals :).
Almond milk
You can blanch the almonds (this is not necessary, though, since they are healthier when unblanched). Soak them in cold water for 8-10 hours to start the sprouting process and make the almonds soft.
Ingredients:
- 1 cup almonds, soaked in water
- 3½ cups filtered water
- 2-4 dates (to taste)
- 1 whole vanilla pod (chopped) or ½ teaspoon vanilla extract
- ¼ teaspoon cinnamon
- a pinch of sea salt
Preparation:
Place almonds in a bowl and cover them with water, leave it overnight (8-10 hours). When the morning comes, rinse them and drain them well. Then throw them into the blender, adding water, dates, and vanilla. Now run the blender at high speed for 1 minute. Next, put the mixture onto a linen cloth which will serve as a strainer. Then, squeeze the milk into the bowl through the small holes (this may take several minutes, so be patient!). Afterwards, mix it with sea salt and cinnamon. Store in the refrigerator for 3-4 days.
Soy milk is probably the oldest and most popular among the substitutes for cow’s milk. When buying, it is important to always go for the one that is certified organic. Soya is very often genetically modified, and it is also a very common allergen.
Preparation:
Grind the soybeans with water in the proportion of 1:1, press and then parboil for about 10 minutes over low heat. When boiled, soy milk produces thick and frothy foam. Just collect it with a spoon and discard, increasing its digestibility this way.
The following types of plant-based milk require boiling after pressing: millet, buckwheat, and unfermented rice milk.
Unfermented rice milk
Grind the rice with water in the proportion of 1:1, then press and finally parboil.
Fermented rice milk
Ingredients:
- ½ cup rice
- 8 cups filtered water
- 1½ teaspoons salt
- ½ cup Rejuvelac
- 1 teaspoon honey or xylitol
- ¼ vanilla pod
Preparation:
For fermented rice milk, you need to cook rice for quite a long time. Boil half a cup of rice in a covered pot with 8 cups of water for about 2 hours over low heat. When it’s already cooked, grind the rice in batches. Combine them after grinding, adding 1½ of teaspoons of salt to each one. Add half a cup of Rejuvelac and leave for 2-3 days. When the waiting is over, stir it and then drain the thick rice mixture. Now, you can sweeten it with honey or xylitol. To finish it off, season it with vanilla.
Coconut milk
Ingredients:
- 4 cups filtered water
- 2 cups coconut flakes
Preparation:
In a pot, bring the water to a boil, pour the coconut flakes and keep cooking. Then blend it together until smooth. Drain the milk obtained this way through a sieve, pressing your hands against the mixture. Pour the milk into a glass container. Store in the fridge. Remember to give it a good shake before opening the container.
Good luck!


Comments No Comments
Join the discussion…